Showing posts with label photography. Show all posts

Happy Easter 2013!

Happy Easter everyone!


It's amazing how much things have changed since last year...


*******
For God so loved the world that he gave his one and only Son,
that whoever believes in him shall not perish but have eternal life.
~John 3:16

Care Packages

A care package is a box of goodies (food, clothing, gifts, useful items, fun items, etc) that you mail to a loved one who is away from home.  USPS Flat Rate Priority Mail boxes are free to use and you can even go to the USPS website and have a pack of ten or more sent to you for free.  You don't have to use the specific APO/FPO boxes but I like them because they say "America Supports You" on the sides.  You pay a discounted rate when you mail a large flat rate box to an APO or FPO address, regardless of how much it weighs.

I did not try to mail Cameron but she does look cute in the box!  This was a very simple photo setup.  I draped a large flag for the background, sat Cameron up in a mailing box (the front flap of the box is folded inside and taped in place), and handed her a marker to hold!  I actually Photoshopped the writing onto the box which was easier than trying to write it perfectly by hand.  The font that I used is Violety Crumble which is a free download from dafont.com.  If you are a Photoshop junkie like me, then you'll also want to know that I rasterized the type and slightly rotated some of the individual letters to give it a more handwritten look.


I managed to send Johnnie eight care packages since he deployed in October.  That's not bad considering that I have a baby that keeps my days very busy!  If I had more time, I probably would've mailed him one every other week.  Care packages are so fun to put together and a great way to send your love.


Before Johnnie deployed, I started a "Deployment Inspiration" board on Pinterest.  That is where I got the idea of decorating the insides of the boxes.  It's very simple to do with the large flat rate priority boxes and the decorated boxes are such an unexpected treat to open!  Each box I mailed him had a theme for the decorations and what was inside.

The large flat rate USPS priority boxes are 12x12.  Scrapbook paper is 12x12.  See where I'm going with this?  To decorate the inside of a box, you need five pieces of scrapbook paper: 1 whole sheet for the bottom, 2 sheets cut in half for the flaps, and 2 sheets cut in half for the sides.  You can also use wrapping paper, photographs, the Sunday comics, your child's artwork... the possibilities are only limited by your imagination!

I have a paper cutter (which is worth it's weight in gold if you are a crafter) so it takes no time at all to trim the paper to fit.  I then use double-sided tape to secure the paper to the box (put the tape close to the edges of the paper for best results).  You can find large rolls of double-sided tape, and of varying widths, in your local craft store.

My first boxes were simply decorated with paper.  Each box got a little more elaborate with stickers and pictures.  You can purchase scrapbooking stickers to use or you can create your own stickers by printing images or words onto sticker paper.

A few care package tips:
  • Don't pack soap or other scented items in the same box as food because the scent transfers
  • Using a FoodSaver to vacuum seal baked goods will keep them fresh for the long journey
  • Anything that could potentially leak, ooze, or melt should be sealed in one or two ziplock bags
  • Anything that could be damaged by getting wet should be sealed in a ziplock bag.
  • Pack the boxes very full, filling extra space with crumpled paper or bubble wrap.  This keeps the contents from shifting and the box costs the same to ship regardless of weight anyway.
  • Don't forget that you are allowed to decorate the outside of the box too!


* Halloween Care Package *  Johnnie deployed at the very end of October so I sent him a small flat rate box filled with some candy.  I was inspired by this post on craftsbyfriends.com I found via Pinterest to create the sayings that I printed out on sticker paper and wrapped around the candy.


*  Good Night Care Package *  Johnnie needed some sheets for his bed so that was the inspiration for this package.  Along with two sets of sheets, I also included soap, face wipes, toothbrushes, toothpaste, dental floss, a notepad, pens, stamps, and envelopes.  I've since then learned that deployed military can mail letters for free so the stamps weren't needed but we can always use them when he gets home.


*  Coffee Care Package *  You can tell by this package that Johnnie wasn't exactly camping in the wilderness for this deployment.  He is a Seattle boy who loves his coffee and had access to an electric water kettle so I sent him our little French Press coffee maker, whole coffee beans along with our bean grinder, disposable coffee cups, and some biscotti.  The coffee bean heart sticker in the box is simply an image I found in a Google search and printed out on sticker paper.


* Thanksgiving Care Package *  I am very proud of this package because I managed to send an entire Thanksgiving feast in a flat rate box!  I included turkey and stuffing (turkey jerky, turkey spam, Hormel Turkey & Dressing microwavable bowl), mashed potatoes (instant mashed potatoes cup), vegetables (a small can), cranberries (Craisins), breadsticks (the hard cracker type), dessert (homemade cookies and "apple pie" snack pack pudding), sparkling cider (mini bottle), and a pack of plastic utensils for eating everything.


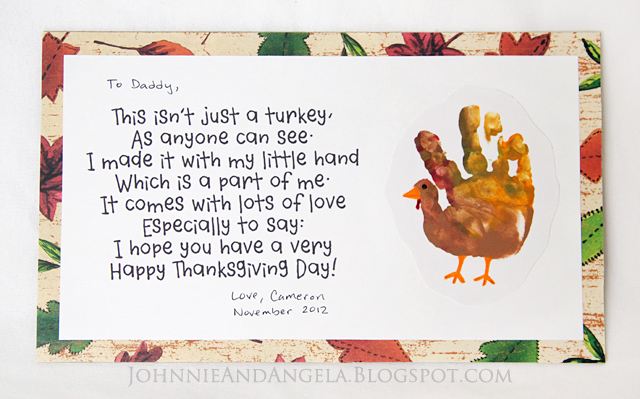
I did a little turkey handprint art with Cameron to send along in the care package:


* Birthday Care Package *  Johnnie's birthday was in December.  This was a "fitness themed" care package which I describe in detail below.  I also baked him some homemade sugar cookies using my new all-time favorite recipe.  I found a Vanilla Almond Sugar Cookie recipe from the blog Bake at 350 via Pinterest and it is AMAZING!   It is super quick and easy to make, the dough doesn't need chilled like other recipes, it holds its shape perfectly when baked (roll thick 3/8" or 1/2"), the cookies are soft and delicious, and they freeze (and thaw) flawlessly!  I used Bake at 350's royal icing recipe as well (my first time ever working with royal icing!) and I'm pleased with the way they came out.  I vacuum packed the cookies in bags using my FoodSaver which helps them stay airtight and fresh until they reach their destination.


* Fitness Care Package *  Johnnie is exercising and running as much as he could on this deployment so I sent him things that would be helpful:  protein powder, a Blender Bottle, a men's multi-vitamin, Emergen-C mix (1,000mg of Vitamin C per packet!), energy bars, protein bars, GU energy gels (my favorite for long runs), mixed nuts, and two different sized handheld running bottles.  Johnnie has an unlimited supply of Gatorade at his base or else I would've included Gatorade powder as well.


* Christmas Care Package *  This was our first Christmas apart... we've been lucky for the past five years! I printed a photo from each year onto sticker paper to add to the box decoration.  This package was filled with a variety of homemade Christmas cookies (including some homemade decorated sugar cookies), some store-bought Christmas treats, and a Christmas present.  This year I got Johnnie a Garmin Forerunner 610 GPS Heart Rate Monitor to help him with his running goals.


* Valentine's Day Care Package *  This was an easy theme of love and shades of the color red.  It's actually a lot of fun walking through stores to see how many items of a certain color you can find!


* St. Patrick's Day Care Package *  This was another color theme... green!  St. Patrick's Day was perfect timing for Girl Scout cookies so I added Thin Mints which have a green box and Samoas (not pictured) which I covered with green stickers so it would match :)


The St. Patrick's Day package was the last one that I sent.  I'm very happy to know that if I sent another package now, he might not get it before he heads home!

*******
They don't know how long it takes
Waiting for a love like this
Every time we say goodbye
I wish we had one more kiss
I'll wait for you I promise you, I will
~Lucky by Jason Mraz

Taking Baby Christmas Photos


I was once a professional photographer.  It's still fun to say that :)  I took a hiatus from teaching elementary school back in 2006 and worked as a photographer and studio manager of a popular portrait studio chain for a while.  I really haven't done much portrait photography since then but now that I have Cameron, I'm easing back into it.  I have a neighbor friend who has a daughter only two months older than Cameron.  She supplied the lights and the props, I set up the makeshift studio in the guest bedroom, and we got some great photos of our daughters for Christmas.

This is an easy setup that anyone can recreate if you have a spot in your house with good lighting.  Our guest bedroom has a huge window so I set up the studio there.  I used only the natural light from the window, no other artificial light or flash of any kind (besides the Christmas lights obviously).  With the babies on the bed, I could easily stoop down beside the bed to be at their eye level.  Had we set this up on the floor, I would have had to lay on the floor to get these shots.

What you will need:
  • White backdrop - a white sheet, quilt, blanket, fabric, or even just a white wall!
  • Christmas lights - with white wire if you are using a white backdrop.  The green wire lights would work with a dark backdrop.
  • Somewhere to hang your backdrop and lights - a backdrop stand, some coat trees, a bed headboard, or even tacked to a wall... get creative!
  • DSLR Camera - (a camera with interchangeable lenses).  You just can't get the same look with a point-and-shoot or an iPhone camera.
  • posing pillow (depending on the age of the baby) - a Boppy or Mombo work great!
  • props - outfits, hats, headbands, etc...


A Boppy or Mombo both make an excellent posing pillow for babies and if you have a baby, you probably have one of these pillows already!  I have both and personally like the Mombo better.  It is dual-sided (a soft side and a firm side), is thicker than the Boppy, and holds its shape better.  For the Christmas photos, I draped fabric over the Mombo. (I actually used my white bathrobe in Cameron's photos!)  I took the decorative cover off of my Mombo for the photos so that the pattern wouldn't show through.  


You need to use the Aperture Priority setting on your camera and set the aperture to the smallest number that it will go to.  How to do this differs among the different makes and models of cameras so read your camera's instruction manual if you don't know how.  Don't worry, it should be a simple process no matter what type of camera you have.

I used the Canon 50mm f/1.8 lens for the Christmas photos.  If you enjoy taking portrait photos, you really should get this lens.  Available for Canon and Nikon, the lens is only around $100!  It's a sharp little lens with great depth of field that has hundreds of rave reviews for good reason and you can't beat the price.

The lower the number you set your aperture to, the more blurred the background will be.  The 50mm can go as low as f/1.8.  Most other average lenses will go down to at least f/4.  Even at f/4, you will still get glowing globes of light, just not quite as large as at f/1.8.


Aperture is not the only thing to consider when creating a blurry background.  Increasing the distance between your subject and the backdrop has a HUGE impact on the depth of field (blurriness of the background).  Look at the samples below.  I used the same aperture setting on both but I moved my subject farther from the background in the second photo... what a difference!


If you choose the right settings on your camera, you should only have a few adjustments to do on the computer afterwards.  What are the "right settings"?  It depends on your camera and how it works with the lens on it!  For example, my camera tends to underexpose images (make them too dark), especially with my primary lens, so when I take photos I have to overexpose to compensate for the look I'm after.  Therefore the exact settings for my camera probably won't get the same results on your camera.  You really have to experiment with your camera to know what works best.

When taking photos of people, especially babies, it's usually better to overexpose a bit.  A brighter photo will lighten shadows and make skin appear smoother.  Brightness and contrast can always be adjusted on the computer afterwards as well with most any photo editing software.


Have your studio set up and props ready ahead of time so you can work quickly when you have a happy baby.  With a digital camera, you don't have to worry about how many photos you take.  You'll have a ton of photos that you will delete, but you will also have that handful of gems that make you smile every time you look at them :)


*******
"You don't take a photograph, you make it."
~Ansel Adams

Family Friday: 3 Months Old

13 Weeks Old


It's hard to believe that Cameron is 3 months old already!  In one sense it feels like forever ago that she was born, but then it also feels like time is flying by.  She started her life at 5 lbs 13 oz and now weighs 11 lbs  6 oz.  I am still exclusively breastfeeding Cameron and I feed her on demand.  During the day, she eats about every 4 hours, but in the evenings her last few meals are every 2 hours.  At night she sleeps 7 to 8 hours straight and she usually takes 3 naps during the day.  She still gets very fussy in the evenings from about 5pm until she's ready for bed.

Cameron has gotten better at rolling over!  She doesn't do it often but when she does decide to roll, she can do it very quickly now.  She still smiles, laughs, and "talks" a lot!  I most love when she flirts with me - she'll turn her head, look at me out of the corner of her eyes, and smile bashfully.  It melts my heart every time :)

In the past week, Cameron has mastered a couple new things.  First, she has discovered that kicking her feet while sitting in her bouncy chair makes the chair bounce!  It's so cute to watch her excitement as she bounces herself :)  Second, she now turns her head to follow action.  She follows Dulce and I with her eyes and by turning her head to keep us in sight.

My mother got here this week for a 10-day visit!  My grandma was supposed to come as well but she recently broke her ankle.  We were sad she couldn't come but we think of her daily and can't wait to see her in the spring!

Cameron is having a great time getting to know her Nana, and my mom is certainly enjoying the time with her newest granddaughter.  Having her here gives me a little more free time so hopefully I can catch up on some blog posts, holiday baking, and the hundred other things on my To-Do list!


Lots of smiles and giggles for Nana :)


I am still running at least 3 miles every other day.  With my mom here, Dulce and I have done a couple runs alone, leaving Cam at home.  Without the stroller we certainly run faster, doing an 11 minute mile versus a 12:30 minute mile.  On December 15, I will be running a 5K race pushing Cam in the Bob.  It will be my first race in well over a year and I'm so excited!

Starting on Monday, I'm taking on a 60 day Beachbody Insanity challenge with some friends, led by a Beachbody coach to keep us all on track.  I have the Insanity videos and used to do them a year ago before getting pregnant.  I love Insanity!  It's a tough workout that burns tons of calories and only takes about 30 minutes a day which is totally doable even with a new baby in the house.


I have a severe shortage of random Cameron photos this week!  There is actually a reason for that... Christmas photos.  First, I photographed a friend's little girl who was 4.5 months old.  It was a lot of fun and super easy to get a ton of great photos of her!  Photographing Cameron who was not quite 3 months old, however, was considerably more challenging because of the more limited poses she can do and her extremely short happy-for-the-camera span.  It took an entire week of 5-minute sessions to get enough photos of Cam to satisfy the photographer in me.

I created a simple photo studio setup in the guest bedroom and got great photos using only a few things you may already have in your house.  In a few days, I'll put up a blog post showing how you can recreate this same look in photos of your little one if you're up for the challenge :)


*******
"Grandmas hold our tiny hands for just a little while, but our hearts forever."
~Author Unknown

Family Friday: Deployed

7 Weeks Old


Johnnie deployed this week.  Cameron, Dulce, and I will be missing him like crazy and praying for his safety every minute until he comes home to us.  Before he left, I took these photographs of him in his deployment uniform with our daughter.  She'll be a lot bigger the next time he holds her.


*******
"May the Lord keep watch between you and me
when we are away from each other."
-Genesis 31:49

Santa Dulce

Dulce has been known to wear clothes for special occasions so I couldn't pass up this Santa outfit I found a few weeks ago!


*******
"Christmas is not just a date. It is a state of mind."
~Mary Ellen Chase